Adding call and appointment (Call To Action) buttons makes it easier for patients to schedule and communicate with your practice.
To update your Call To Action buttons:
Log onto the PracticeBeat Dashboard.
Click “Website” on the left side column; a drop-down menu will appear.
Click “Website Editor”; on the right, a tab with an icon titled “Menu Bar” will appear; click on “Menu Bar”.
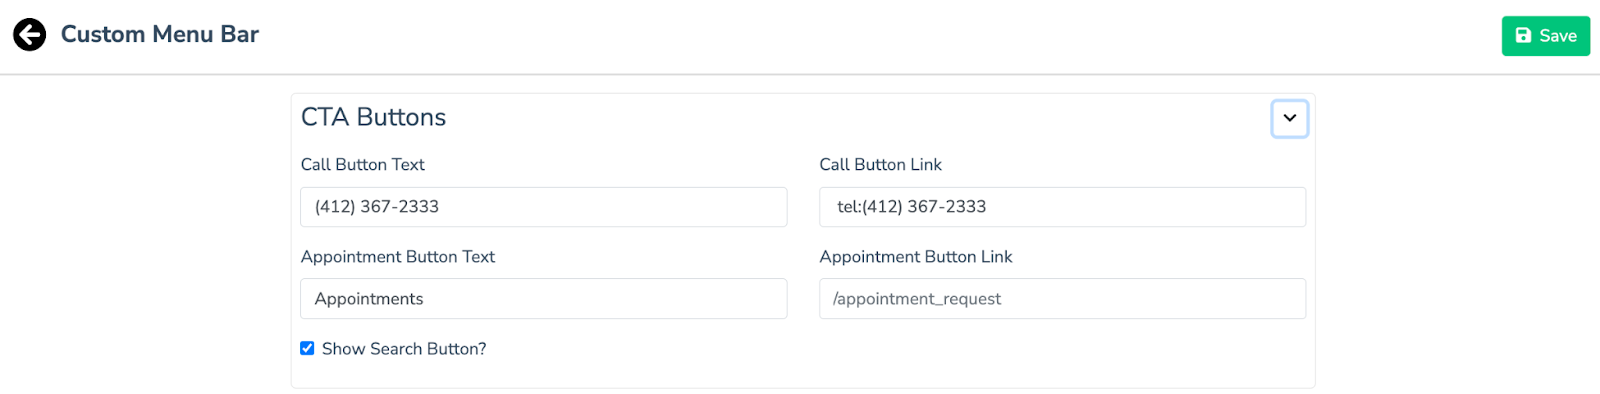
A “Custom Menu Bar” tab will appear. Click the arrow located on the right of “CTA Buttons” to edit them.
A drop-down menu will appear consisting of the fields “Call Button Text,” “Call Button Link,” “Appointment Button Text,” and “Appointment Button Link”.
Under the field “Call Button Text,” write the cell number you would like patients to contact your practice with.
The “Call Button Link” allows patients to call the number directly, without typing it themselves. If you would like to add this, write the cell number down with “tel:” in front of it. A possible field entry would be “tel:123-456-789”.
Under the field “Appointment Button Text” write down the phrase you would like on your appointment button. A typical entry would be “Schedule an Appointment”.
The “Appointment Button Link'' takes patients directly to a tab where they can fill out a form to request an appointment. If you would like to add a third-party appointment scheduling site, under this field write the link you would like patients to go to when filling out an appointment request. Keep this field empty if you want to use the PracticeBeat Appointments feature.
Click the “Save” icon on the top right to finalize your changes once you have updated your CTA buttons.

Was this article helpful?
That’s Great!
Thank you for your feedback
Sorry! We couldn't be helpful
Thank you for your feedback
Feedback sent
We appreciate your effort and will try to fix the article